10 essential drills for the two most important shot-creation skills in college basketball — the pull-up mid-range jumper and the step-back shot from every distance. Click any section to explore.
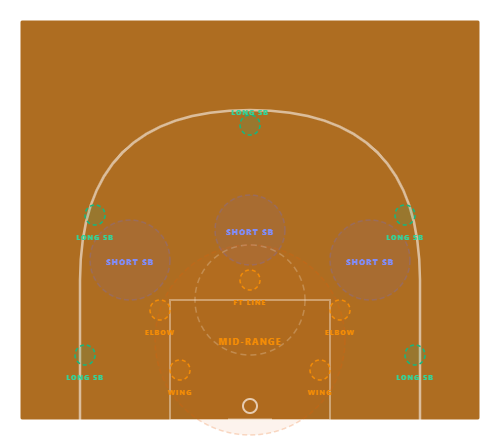
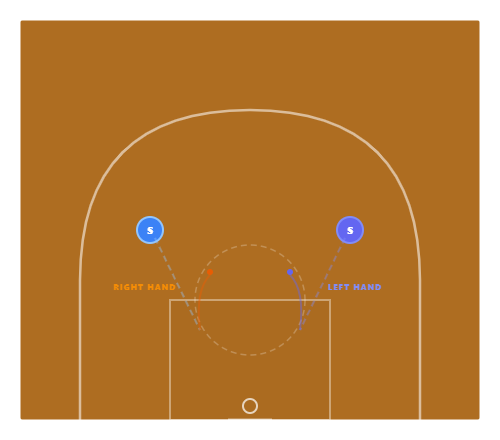
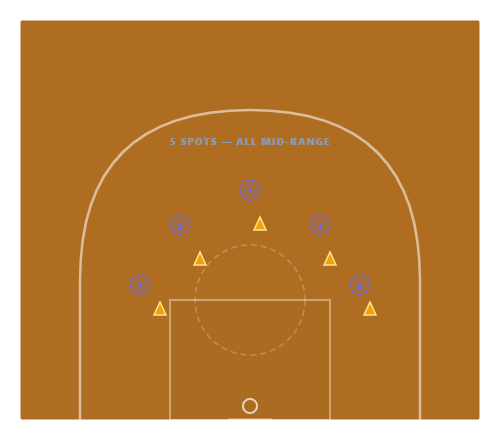
Shot Zone Map
Understanding where each shot lives on the court. The mid-range (10-20 ft) and step-back zones are the most contested areas in basketball — mastering them makes you unguardable.
Mid-Range (10-20 ft)
Short Step-Back (12-18 ft)
Long Step-Back (20+ ft / 3PT)
Why These Shots Matter: Analytics killed the long two — unless you can create it yourself off the dribble. The pull-up mid-range and the step-back are “unanalyzable” because they’re created, not schemed. When the play breaks down, the shot clock is dying, or you need a bucket in the clutch — this is how you score. DeMar DeRozan, Kevin Durant, and Jalen Brunson built their games here.
Mid-Range Pull-Up Drills
Five drills that build the pull-up mid-range jumper — the most important individual scoring weapon in college basketball. From stationary form work to full-speed game simulation.
8
Min
60+
Shots
1-2
Players
10-17 ft
Range
Medium
Intensity
Setup: Start at the top of the three-point line. A cone is placed at the free-throw line to simulate a defender. Three spots are marked: left elbow, free-throw line center, and right elbow. One hard dribble toward the cone, pull up for a mid-range jumper at 12-17 feet. 10 makes from each spot.
The 1-Dribble Pull-Up: Attack with ONE hard dribble directly at the cone. As you reach the cone, plant your inside foot (left foot if going right, right foot if going left), bring the outside foot even, and rise straight up. The ball comes to your shooting pocket DURING the stop — not after. Your eyes find the rim as your feet plant. This timing is everything: dribble, plant, rise, release — one fluid motion.
Wing Angles : Repeat from both wings. From the right wing: one dribble toward the right elbow, pull up. From the left wing: one dribble toward the left elbow, pull up. The footwork is mirrored — from the right wing, plant the LEFT foot; from the left wing, plant the RIGHT foot. 10 makes each side. This is the most common mid-range shot in college basketball — the wing-to-elbow pull-up.
Crossover Pull-Up : Add a crossover before the pull-up. Start at the top, crossover left-to-right, one hard dribble, pull up at the right elbow. Then crossover right-to-left and pull up at the left elbow. The crossover creates lateral separation — the pull-up capitalizes. 10 makes each direction. This is the shot that separates college guards from high school guards.
Coaching Points
1 Inside foot plants first — this squares your hips to the basket automatically
2 The ball reaches your shooting pocket AS your feet set, not a beat later — timing is everything
3 Go STRAIGHT UP on the shot. Forward drift = misses. Rise vertically.
4 Keep your eyes on the rim from the moment you pick up the dribble — never look at the ball
5 The 1-dribble must be a POWER dribble — hard and low, covering ground, not a lazy push
6 Practice at 60% speed first. Once the footwork is automatic, increase to game speed.
The D1 Standard
Mid-range pull-ups should convert at 42-48% in practice. In games, elite guards hit 40-44% from mid-range. This is higher than the three-point line and more reliable in late-clock situations.
Who Lives Here
Press-break turnovers are the most costly turnovers in basketball — they lead directly to layups going the other way. A team that loses 4-5 possessions to the press gives up 8-10 easy points. Press-break passing drills prevent these catastrophic turnovers.
6
Min
50+
Reps
1
Players
6-12 ft
Zone
Medium
Intensity
The Trap Situation: 1 catches the inbound and is immediately double-teamed on the sideline. Two defenders collapse on the ball. 1 is pinned between two defenders and the sideline. This is the most common press trap: the ball handler catches, and two defenders sprint to create a 2-on-1 trap. The drill teaches 1 how to ESCAPE the trap without turning the ball over.
Both Hands : Practice the floater with your right hand driving from the right side, and your left hand driving from the left side. Right-hand floater: last step is the left foot, extend the right hand with a soft push. Left-hand floater: last step is the right foot, extend the left hand. 10 makes each hand from each wing. Ambidextrous floaters are non-negotiable at the D1 level.
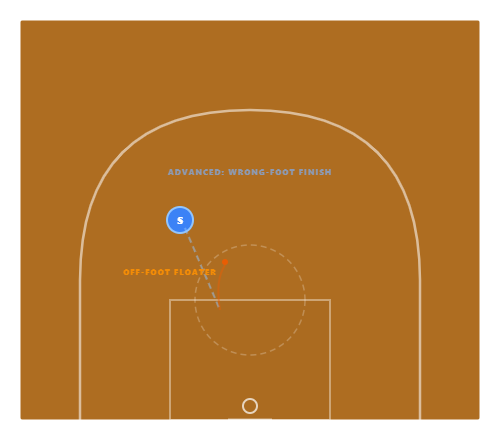
Off-Foot Progression: The advanced floater: shoot off the “wrong” foot. Right-hand floater off the right foot (instead of the left). This is counter-intuitive but ESSENTIAL — in traffic, you can’t always get to the correct foot. Tony Parker and Kyrie Irving mastered the off-foot floater. 10 makes each side. This is what separates elite finishers from average ones.
Coaching Points
1 One-handed release — not a two-handed push shot. The off hand guides, the shooting hand does all the work.
2 HIGH arc is critical — the floater goes OVER the shot-blocker, not past them
3 Use the backboard when driving at an angle — aim for the top corner of the square
4 Soft touch: the ball should die on the rim. If it’s hitting hard, you’re pushing too much.
5 Release at the TOP of your jump, not on the way up — this gives you maximum arc
6 The floater is a rhythm shot: dribble, dribble, step, float. Don’t rush the gather.
Paint Scoring
The floater converts at ~45% in college basketball — higher than mid-range jumpers and comparable to layups when accounting for blocks avoided. It’s the most underrated shot in the sport.
Against Shot Blockers
The floater exists because of shot blockers. When a 7-footer is at the rim, you can’t lay it up — but you CAN float it over them. Every guard who succeeds in the Big 12, Big East, or ACC needs this shot.
8
Min
50+
Reps
5
Players
12-18 ft
Zone
High
Intensity
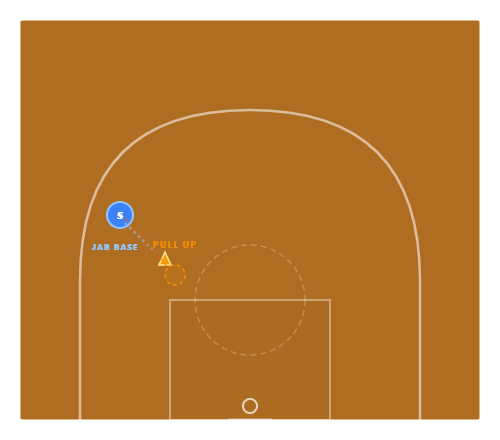
The Jab Step: Catch the ball on the wing in triple threat. Jab step toward the baseline with your inside foot — sell the drive. The defender reacts by dropping their weight to stop the drive. The moment they react, pull the ball back and take one dribble toward the elbow for a mid-range pull-up. The jab creates the space; the pull-up exploits it.
Jab Baseline, Go Middle : Jab baseline, but instead of going baseline, cross over and attack the middle of the floor. Pull up at the elbow or free-throw line. This is the counter — the defender bit on the baseline jab and can’t recover when you go middle. 10 makes from each wing. The jab-then-go-opposite is the fundamental deception of mid-range scoring.
Jab & Shoot : Jab step, and if the defender doesn’t react (they sit back), simply pull up and shoot the catch-and-shoot jumper. No dribble needed. The jab creates a decision for the defender: react or sit. If they react → attack. If they sit → shoot. Triple threat is deadly only if you have BOTH options. 10 makes, no dribble, off the jab step.
Coaching Points
1 The jab must be aggressive and believable — step 12+ inches toward the baseline
2 Read the defender’s feet, not their hands: feet move = they bought it → attack. Feet still = shoot.
3 From the wing, the pull-up lands at the elbow — the sweetest mid-range spot on the floor
4 On the jab-and-go-middle: the crossover must be tight and low. Wide crossovers get stolen.
5 Keep your off hand on the ball during the jab — protecting against the reach
6 The jab-and-shoot has zero dribbles. Feet are already set. Catch, jab, rise. Under 1.5 seconds total.
Triple Threat
The jab step is the essence of triple threat: you can shoot, pass, or drive from one position. The pull-up off the jab is the scoring option. Without it, the defense only has to guard the drive and the pass — making both easier to take away.
Practice Both
You MUST practice both the jab-and-shoot AND the jab-and-drive. If you only jab-and-shoot, defenders stop reacting. If you only jab-and-drive, they stop respecting the shot. The mix is what makes you unguardable.
10
Min
60+
Shots
2-3
Players
10-17 ft
Range
High
Intensity
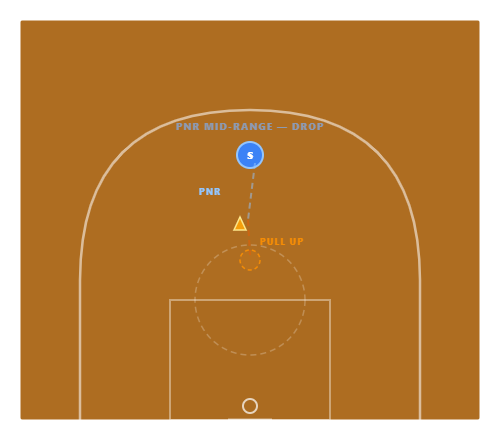
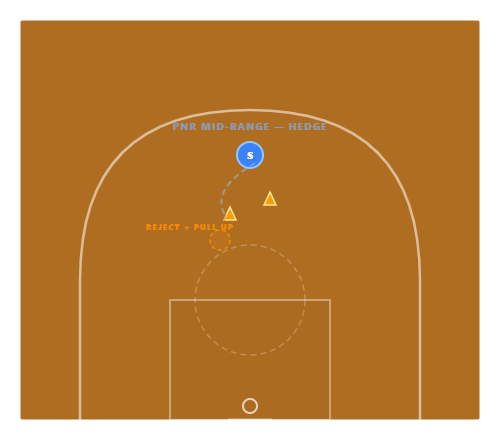
vs. Drop Coverage: A cone simulates the screener at the elbow. Dribble off the “screen” and attack. The defense “drops” — the big man sags into the paint. You pull up in the open space at the free-throw line. This is the most common PnR mid-range: the big man gives you space, you take the 15-footer. 10 makes from the right and left side.
Split the Trap : Two cones — one screener, one representing the hedging big. The big man jumps out to stop you from turning the corner. Counter: reject the screen (go back the other way), one dribble to the wing elbow area, pull up. The hedge takes away the drive — the mid-range pull-up punishes it. 10 makes each side. Rejecting the screen is the highest-IQ PnR move.
vs. Switch : A single cone at the free-throw line represents the BIG who has now switched onto you (a guard). Attack the mismatch — one or two dribbles to get the big backpedaling, then pull up in his face. The mid-range pull-up over a bigger, slower defender is the highest-percentage shot in PnR basketball. 10 makes each side. This is how Jalen Brunson scored in the NCAA Tournament.
Coaching Points
1 Read the coverage BEFORE you use the screen: drop → pull up. Hedge → reject. Switch → attack.
2 Against drop coverage: don’t drive into the big. Stop at the free-throw line — that’s YOUR zone.
3 Against the hedge: the rejection move must be decisive — one hard crossover back the other way
4 Against the switch: attack the big’s hip, not their chest. Get them on their heels, THEN pull up.
5 The ball must be in your shooting pocket as you plant — no separate “gather” after stopping
6 This drill requires a mental rep too: visualize the coverage and the read before each shot
PnR Reality
Over 40% of college half-court possessions include a ball screen. The mid-range pull-up off the PnR is the most common shot in the sport. If you can’t score here, you can’t run an offense.
Three Coverages
Every defense plays one of three PnR coverages: drop, hedge/show, or switch. This drill teaches the mid-range counter to each. Master all three reads and no PnR coverage can stop you.
4
Min
40+
Reps
2
Players
8-15 ft
Range
Medium
Intensity
Offense Press D
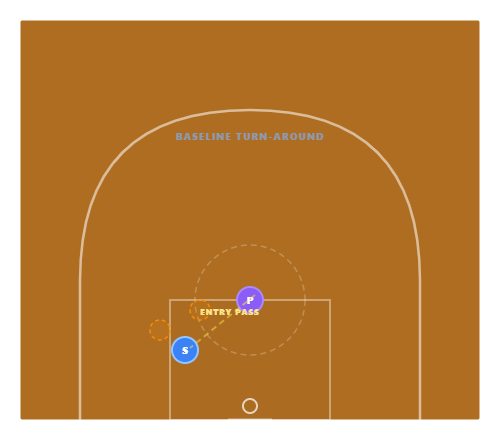
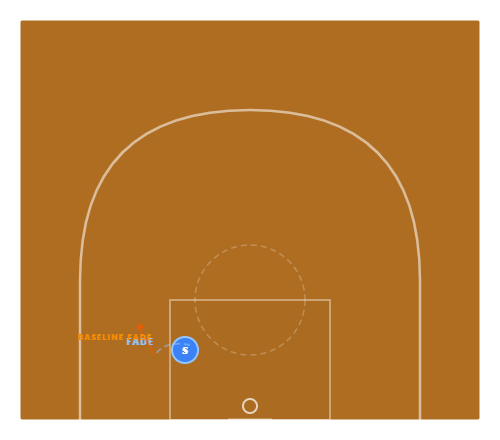
Setup: Catch the ball on the low block or the short corner area, with your back to the basket. A passer feeds from the elbow. You’ll execute a turn-around jumper — either a pivot-and-face or a fadeaway over the baseline. This shot is money for forwards and wings who can operate in the mid-post area.
Offense Press D
Pivot to the Middle : Catch on the block. Reverse pivot (spin toward the middle of the lane) to face the basket. Rise up for a jumper from 10-12 feet. The reverse pivot creates separation because the defender expects you to go baseline. 10 makes from each block. This is the “dream shake” territory — every great post scorer lives off this pivot.
Offense Press D
Baseline Fadeaway: Catch on the block. This time, pivot toward the baseline and shoot a fadeaway jumper — drifting slightly toward the baseline as you release. This is essentially impossible to block because you’re fading AWAY from the defender and the shot has high arc. The baseline fadeaway from 8-12 feet is one of the most efficient shots in basketball.
Coaching Points
1 Seal your defender BEFORE the catch — the entry pass only works if you have position
2 On the middle pivot: EXPLODE into the pivot. A slow turn lets the defense recover.
3 On the baseline fade: keep your shoulders square to the basket even as your body fades
4 The fadeaway is a feel shot — touch and arc matter more than power
5 Practice the same pivot footwork over and over: right block = left foot pivot, left block = right foot
6 Call for the ball with a hand target — show the passer exactly where you want the entry
Wing-Forward Weapon
The baseline turn-around isn’t just for bigs anymore. Wings like Kawhi Leonard and Jayson Tatum score from the mid-post constantly. Any player 6’3″+ who can catch on the block and face up adds a dimension that’s impossible to scheme against.
Two-Move Player
You only need two moves from the block: middle pivot and baseline fade. If you have both, the defender can’t cheat either way. Two moves, perfectly executed, is more effective than five sloppy options.
Short Step-Back Drills
Three drills for the 12-18 foot step-back — the highest-percentage separation move in basketball. Create space without retreating to the three-point line.
8
Min
50+
Reps
1-2
Players
12-18 ft
Range
high
Intensity
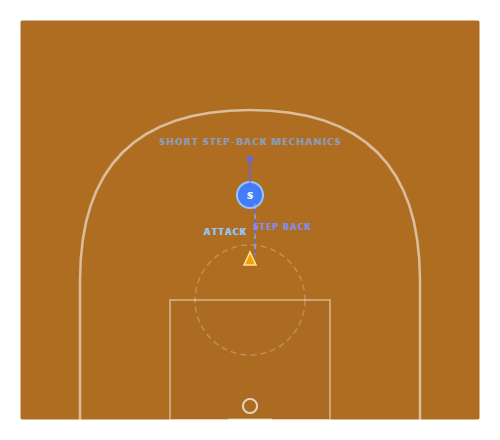
The Mechanics: Start inside the three-point line. One dribble toward the cone (defender). Push off your FRONT foot and step back 3-5 feet — landing INSIDE the arc, not behind it. This is the key difference from the long step-back: you’re creating separation in the mid-range, at 12-18 feet. The shot is higher-percentage because the distance is shorter and the balance is easier to maintain.
5-Spot Rotation : Five spots in the mid-range area — both wings, both elbows, and the free-throw line. At each spot: start 3-5 feet closer to the basket (toward the cone), attack with one dribble, step back to the spot, and shoot. 5 makes at each spot = 25 total. Track your percentage at every spot. The short step-back from the elbow area is the most efficient version — start there.
Crossover + Step-Back : Add a crossover before the step-back. Start at the top, crossover left-to-right, one hard dribble, then step back to the left side into a mid-range jumper. The crossover moves the defender laterally; the step-back creates vertical separation. Two directions of deception in one move. 10 makes each direction. This is the DeMar DeRozan signature move.
Coaching Points
1 Push off the FRONT foot — not the back foot. The front foot drives the separation.
2 Land on BOTH feet simultaneously. One-foot landings = off-balance shots = misses.
3 The step-back distance is 3-5 feet — NOT 6+ feet. You’re staying in mid-range territory.
4 Keep your weight centered as you land — resist the urge to drift backward
5 The ball enters your shooting pocket DURING the step-back, not after you’ve landed
6 Start slow: walk through the footwork 10 times before adding speed. Sloppy reps build sloppy habits.
Why Short Step-Back?
The short step-back gives you separation WITHOUT the distance penalty of a three-pointer. You’re shooting a 15-footer instead of a 23-footer — that’s 8 feet closer to the basket with the same amount of space from the defender. It’s the smart money play.
Efficiency
The short step-back mid-range converts at ~40-44% for elite college guards. That’s higher than the long step-back three (~30-33%) and provides the same unblockable quality. It’s the best risk-adjusted shot-creation move in basketball.
7
Min
40+
Reps
1
Players
12-17 ft
Range
High
Intensity
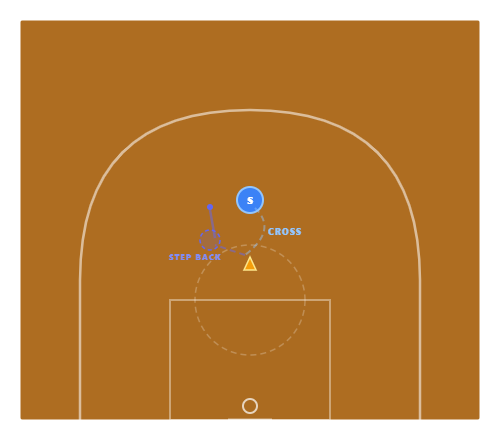
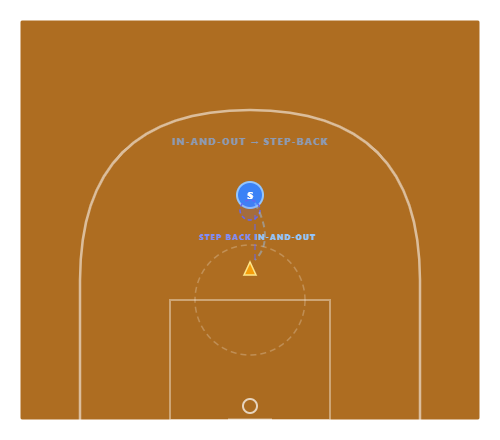
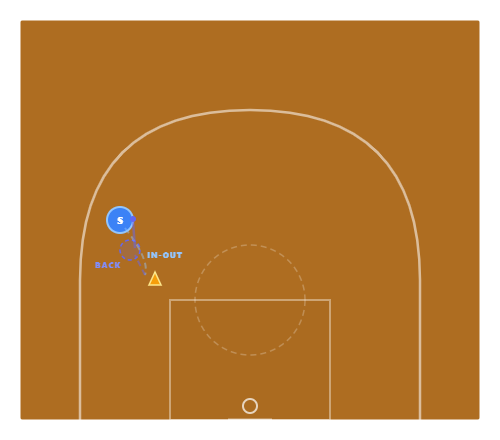
The In-and-Out Step-Back: The “in-and-out” dribble fakes a drive by pushing the ball forward and pulling it back in the same dribble. The defender bites on the forward push — then you step back into a wide-open mid-range jumper. One dribble, two deceptions, one shot. This is the move that Tim Hardaway invented and Kevin Durant perfected.
From the Wing : Start on the wing with the ball. In-and-out dribble toward the baseline (selling the baseline drive). Step back to the wing mid-range area — 14-16 feet. 10 makes from each wing. The wing in-and-out step-back is particularly effective because the defender expects the baseline drive and shifts their weight — making the step-back creates easy separation.
Top of Key — Both Directions : From the top, the in-and-out can go either direction. In-and-out toward the right → step back to the left elbow area. In-and-out toward the left → step back to the right elbow area. 10 makes each direction. From the top of the key, you control which direction to step back — the defender is always wrong if they commit to stopping the drive.
Coaching Points
1 The in-and-out must be CONVINCING — push the ball forward aggressively. If it’s lazy, the defender won’t bite.
2 The pull-back and step-back happen in ONE motion — don’t pause between the in-out and the step-back
3 Stay low through the entire move. Rising up early telegraphs the shot.
4 On the step-back: shoulders square, land balanced, eyes on the rim. Same fundamentals as every pull-up.
5 Practice the in-and-out dribble alone for 2 minutes before adding the step-back — the handle move must be automatic
6 This is a rhythm move: in-out-back-shoot. Four beats. Tap your foot to the rhythm until it’s natural.
Deception Layering
The in-and-out adds a layer of deception that a straight step-back doesn’t have. The defender reacts TWICE: once to the fake drive (in-and-out), once to the step-back. Double deception = double separation. It’s harder to learn but nearly impossible to guard once mastered.
Low Risk
Because you’re stepping back into mid-range (not three-point range), even an imperfect step-back still gives you a makeable 15-footer. The margin for error is much larger than the long step-back three. This makes it ideal for developing players.
6
Min
40+
Reps
1
Players
10-16 ft
Range
High
Intensity
The Spin-Back: Drive toward the basket from the wing. When you reach the cone (defender), execute a spin move — but instead of spinning toward the basket (for a layup), you spin AWAY from the basket into a mid-range pull-up jumper. The spin creates separation by changing your direction 180 degrees. The defender is still moving toward the basket while you’re pulling up behind them.
Both Wings : Practice from both wings. From the right wing: drive right, spin LEFT (reverse spin), pull up on the right elbow. From the left wing: drive left, spin RIGHT, pull up on the left elbow. The spin direction is always AWAY from the basket. 10 makes each side. The spin-back mid-range is effective because nobody expects a spin to go AWAY from the rim — it’s completely counter-intuitive.
PnR Spin-Back : Use the ball screen, drive into the lane, and when the help defense steps up, spin back to the mid-range area for a pull-up. This counters aggressive help defense — they come to stop the drive, and you spin away from the help into open space. 10 makes from each side off a simulated PnR. Tony Parker made a Hall of Fame career off this exact move.
Coaching Points
1 Protect the ball during the spin — keep it on your hip, away from the defender
2 The spin must be TIGHT — a wide spin gives the defender time to recover
3 Plant your pivot foot firmly after the spin — if your feet are sliding, you’re off balance
4 Face the basket immediately after the spin. Square up FAST — you have 0.5 seconds before the defender recovers.
5 The pull-up comes off the back foot (the one you planted during the spin) — this is natural, trust it
6 Start with slow spins: walk through the footwork, then add speed. The spin-back is a coordination move.
Counter-Intuitive
Everyone expects the spin to go TO the basket. The spin-back goes AWAY from it. This mismatch of expectation and reality is why it works: the defender commits their weight toward the rim, and you’re suddenly 10 feet behind them with an open look.
Tony Parker Special
Tony Parker scored more points on spin-back mid-range jumpers than almost any player in NBA history. In college, guards like Marcus Smart and Trae Young used the spin-back to devastating effect against aggressive help defense.
Long Step-Back Drills
Three drills for the deep step-back three — the hardest shot to guard in basketball when executed properly. Build balance, rhythm, and confidence from beyond the arc.
10
Min
60
Reps
1-2
Players
3PT
Range
Very High
Intensity
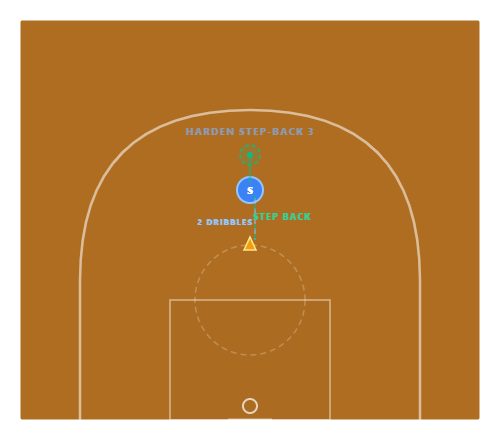
The Harden Step-Back: Two dribbles toward the defender. On the second dribble, gather the ball, push off the FRONT foot, and step back behind the three-point line. The “gather step” is the key — it’s the small step you take while gathering the ball that gives you momentum for the step-back. Plant both feet simultaneously behind the arc. Rise and fire. This is the most devastating shot in modern basketball.
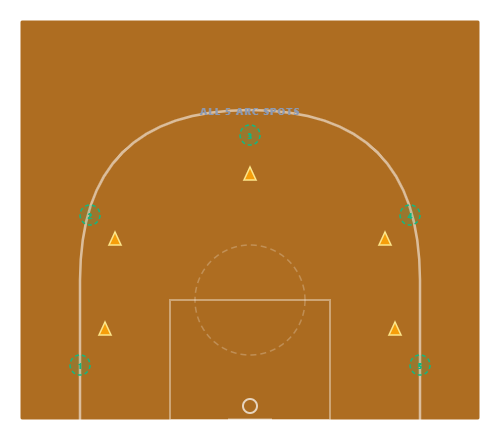
5-Spot Rotation : Five spots around the three-point arc — both corners, both wings, top of the key. At each spot: start 4-5 feet inside the arc (at the cone), attack with two dribbles, step back behind the line, and fire. 5 makes from each spot = 25 total. Track your percentage. The corner step-back is hardest (less space to step back); the top-of-key is most natural. Build from where you’re strongest.
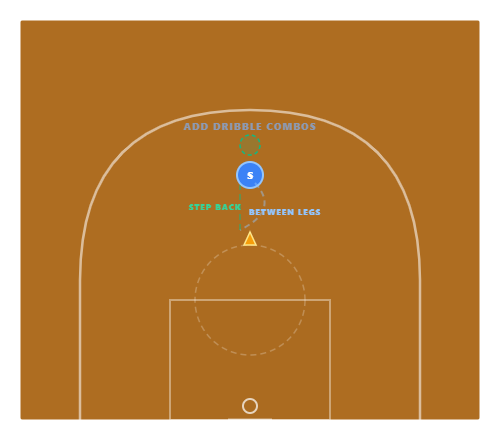
Dribble Combo + Step-Back : Add a dribble move before the step-back: crossover, between-the-legs, behind-the-back, or hesitation. Example: between-the-legs from right to left → step-back three on the left side. The dribble combo freezes the defender; the step-back punishes the freeze. 5 makes with each combo (crossover, BTL, BTB) from each side. High volume, high intensity.
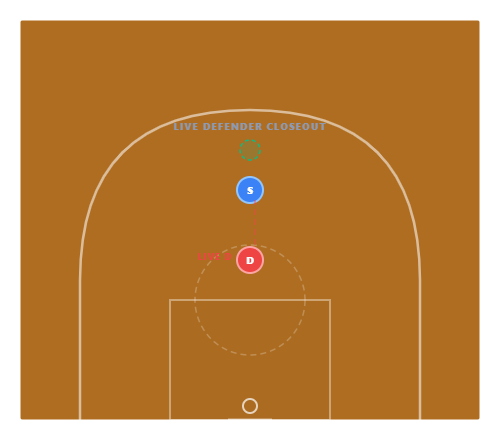
Live Defender: A real defender plays straight-up defense. The shooter must READ: if the defender sits back → step-back three. If the defender presses up → blow by for a layup. If they play honest → use the dribble combo to create an advantage, then step back. This is the final progression — real reads against a real body. 10 possessions, track makes AND shot selection quality.
Coaching Points
1 The gather step is EVERYTHING — it’s the half-step that loads your back leg for the step-back
2 Push off the FRONT foot — your lead foot drives backward momentum. The back foot catches you.
3 Land with BOTH feet behind the arc simultaneously. One foot landing = travel call or off-balance shot.
4 Stay LOW through the step-back. Rising early shortens your step and reduces separation.
5 The ball enters your shooting pocket DURING the step-back — you should be ready to shoot the instant you land
6 The long step-back is a power move: it requires strong legs. If your legs are weak, your shot will be short. Squat heavy.
The Modern Weapon
James Harden made this shot the most feared in basketball. At the college level, Trae Young and Caitlin Clark brought the step-back three to the NCAA. It’s nearly unblockable — you’re 6+ feet from the defender when you release — but it requires elite balance and leg strength.
Honest Percentages
Even elite shooters hit the long step-back three at only 30-35%. That means you’re missing 2 out of 3. The shot’s value comes from its AVAILABILITY, not its efficiency — you can create it anytime, against anyone, without needing a screen or a teammate. Use it wisely.
8
Min
50+
Reps
1-2
Players
3PT
Range
High
Intensity
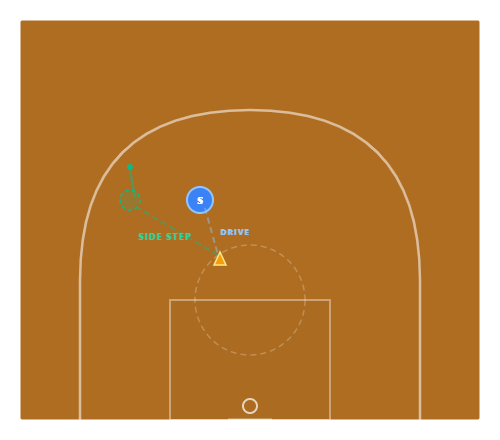
The Side-Step Three: Instead of stepping BACK (toward half court), you step SIDEWAYS along the three-point line. Drive toward the basket at a 45-degree angle, then plant and step laterally behind the arc. The defender is moving toward the basket — you’re sliding along the arc. The angle is completely different from a standard step-back, making it much harder to contest.
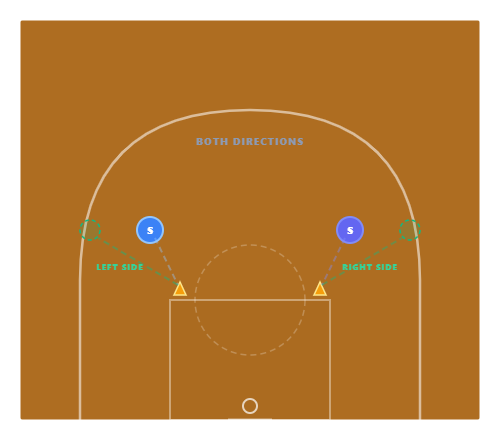
Both Directions : From the left wing: drive toward the basket, side-step LEFT along the arc to the corner area. From the right wing: drive toward the basket, side-step RIGHT along the arc to the corner. 10 makes each direction. The corner side-step is particularly deadly because the corner is the closest three-point shot and the defender has the most ground to cover.
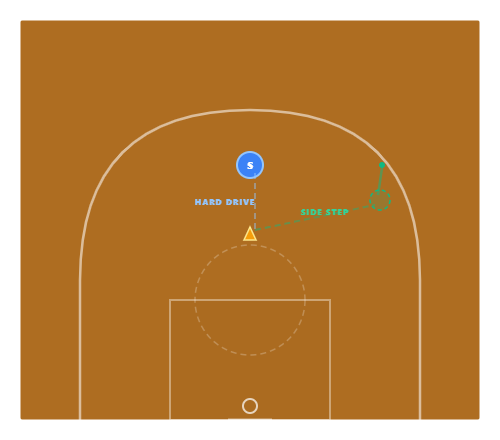
Deep Drive + Side-Step : From the top of the key: two hard dribbles DEEP into the lane, drawing help defense. Then side-step to the right or left wing for a wide-open three. The deep drive sucks the entire defense into the paint — the side-step exploits the empty perimeter. This is the Luka Dončić signature: attack deep, then float to the arc. 5 makes going left, 5 going right.
Coaching Points
1 The side-step is LATERAL — don’t step back toward half court. Step along the arc.
2 Plant your inside foot (closest to the basket) and push off laterally with power
3 Your shoulders must rotate to face the basket DURING the side-step — not after
4 The ball enters your shooting pocket as your feet leave the ground — same timing as any pull-up
5 The side-step from the wing to the corner is the shortest three in basketball — high percentage
6 Keep low during the drive to sell the attack. If you stand tall, the defender reads the step-back.
Geometry Advantage
The side-step changes the geometry of the shot contest. On a standard step-back, the defender can simply follow you backward. On a side-step, the defender’s momentum is going toward the basket while you’re sliding along the arc — they can’t change direction fast enough to contest.
Luka's Signature
Luka Dončić made the side-step three his signature move. In college, players like Tyrese Haliburton and Paige Bueckers use the side-step to create open threes from impossible angles. It’s the most creative step-back variant.
6
Min
40+
Reps
1
Players
Deep 3PT
Range
Medium
Intensity
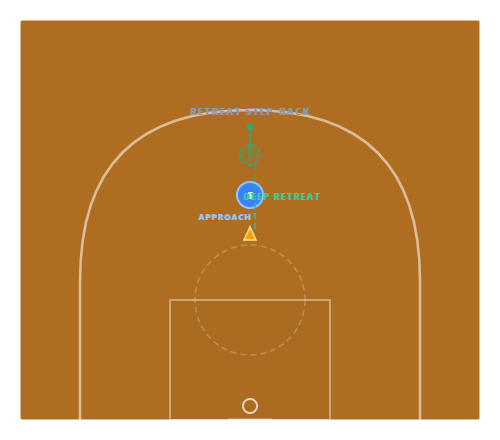
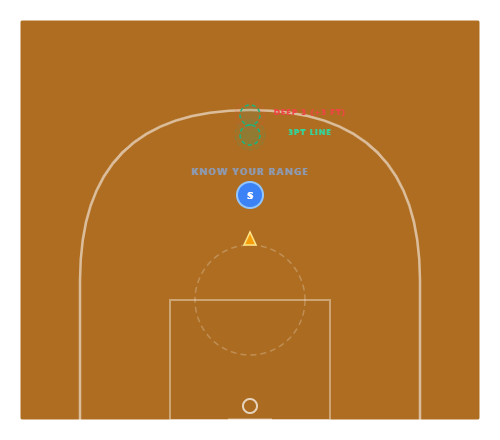
The Retreat Step-Back: A deeper version of the step-back — you step back 5-7 feet, often landing 2-3 feet BEHIND the three-point line. This is a low-percentage bomb, but it’s completely unguardable because no defender can cover that much ground. The retreat step-back is a last-resort shot when the defense is in your face and you need space. One hesitation dribble forward, then retreat behind the arc.
Range Finder : Practice at two depths: (1) just behind the three-point line (standard retreat) and (2) 3 feet deeper than the arc (deep retreat). You MUST know your range limit. If you can hit 30%+ from deep retreat depth, it’s in your arsenal. If you’re at 20% or below, stay at standard depth. Honesty about your range prevents bad shots. 10 attempts at each depth — track percentages.
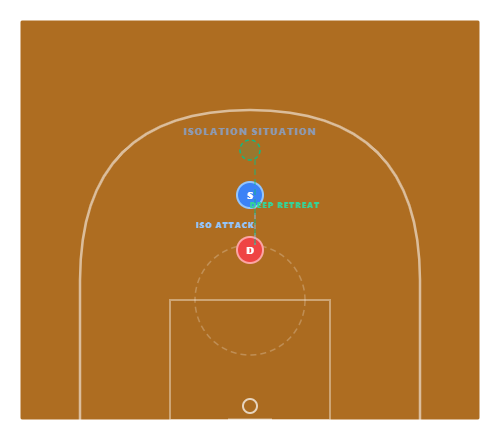
ISO Retreat : Simulate an isolation: start with the ball at the top of the key, a defender (cone or live) is playing you tight. One or two dribbles to probe, then retreat step-back into a deep three when the defender presses up. This is the “get off me” shot — when the defense is suffocating and you need to create maximum space. 5 makes each direction. This is ONLY for moments when nothing else is available.
Coaching Points
1 The retreat covers 5-7 feet — this requires serious leg strength. Squat and lunge heavy in the weight room.
2 Land in the EXACT same balanced stance as a normal three — both feet, shoulder width, square to the basket
3 The hesitation dribble forward SELLS the drive. Without it, the retreat is just a fadeaway.
4 This is a bailout shot — not a first option. Use it when the defense takes away everything else.
5 On the deep retreat: adjust your power. You’re 25+ feet away. Push through your legs more, not your arms.
6 Mental cue: “I’m going to the basket… NO, I’m going to the logo.” Commit to the full retreat.
Emergency Weapon
The retreat step-back is the nuclear option of shot creation. It’s low percentage (28-33% even for great shooters) but utterly unguardable. No defender can stay with a 7-foot retreat. Use it 2-3 times per game maximum — it’s for moments when you have no other choice and you need a three.
Physical Requirement
You need strong legs. The retreat requires explosive backward movement from a standing position, then immediate upward force into the shot. If your legs are weak, the shot will be short every time. Heavy squats, lunges, and box jumps directly improve this shot.
Combo Drills
Two drills that combine mid-range pull-ups, short step-backs, and long step-backs in continuous game-speed sequences. The final stage of shot-creation development.
12
Min
60+
Shots
2
Players
All
Range
Extreme
Intensity
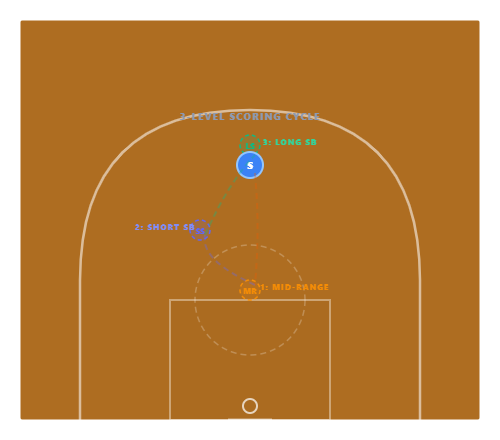
The 3-Level Cycle: This drill cycles through all three shot types in continuous sequence: (1) Pull-up mid-range from the elbow. Sprint back to start. (2) Short step-back from the wing. Sprint back. (3) Long step-back three from the top. Sprint back. That’s one cycle = 3 shots. Repeat for 5-6 cycles = 15-18 total shots. You’re training your body to score from every distance without changing your fundamental mechanics.
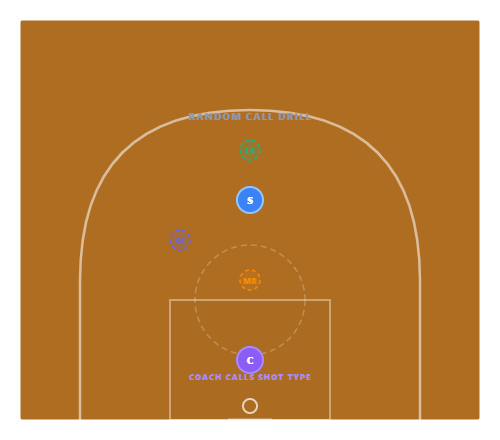
Random Call : A coach or partner calls “MID!” “SHORT!” or “LONG!” as you catch the ball. You must execute the correct shot type in under 2 seconds — no time to think, only react. “MID!” = one dribble pull-up at the elbow. “SHORT!” = dribble-then-step-back to mid-range. “LONG!” = dribble combo into step-back three. 15 random calls per set. This trains instant shot selection — the most important skill for a scorer..
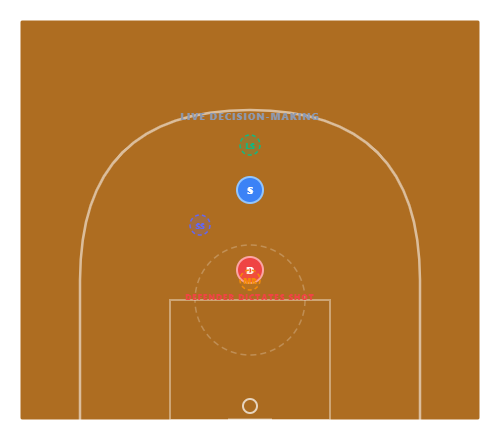
Live Read : A live defender plays you straight up. YOU decide which shot to take based on the defense: if they sag → pull-up mid-range (you have space in front of you). If they play tight → short step-back (create separation inside the arc). If they press up aggressively → long step-back three (create maximum separation). The defender dictates the shot; you execute the right one. 10 possessions, track makes AND decision quality.
Coaching Points
1 The footwork for all three shots is the SAME 1-2 step — the only difference is the distance of the step-back
2 Challenge: can you hit 50% across all three levels in one session? That’s the D1 scorer standard.
3 The random-call version is the most important — it trains reactive decision-making
4 In the live-read version: if you’re always choosing the same shot, the defender isn’t varying enough
5 Keep your shooting form identical at all three distances — same pocket, same release, same follow-through
6 This drill should be done 3-4 times per week. Consistency across all three levels takes months to build.
Complete Scorer
A “complete scorer” can score from all three levels: mid-range, short step-back, and long step-back. If you can only do one, the defense takes it away. If you can do all three, they can’t stop you — they’re always guessing wrong.
The Decision Tree
Defender sags → mid-range pull-up (punish the space). Defender plays even → short step-back (create moderate separation). Defender presses → long step-back (create maximum separation). This decision tree should be automatic.
15
Min
50+
Shots
2-3
Players
ALL
Range
High
Intensity
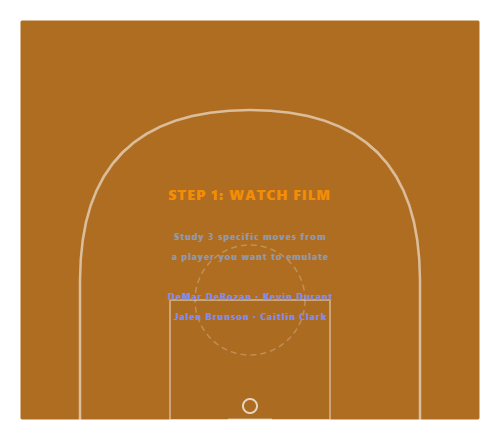
Step 1 — Film Study: Before touching a ball, watch 5 minutes of film of an elite mid-range/step-back scorer. Pick 3 specific moves you want to steal. Watch the FOOTWORK, not the result. How do they set up the defender? Where do they plant? How deep is the step-back? Take mental notes or screenshots. This step is non-negotiable — visualization before execution.
Step 2 — Replicate : Take the 3 moves from film and replicate them on the court. First: walk through the footwork 5 times each. Then half speed for 5 reps. Then full speed for 10 reps. This progression is critical — don’t jump to full speed. The move must feel natural in your body before you add intensity. Use a cone as the defender. Focus on the EXACT footwork you saw on film.
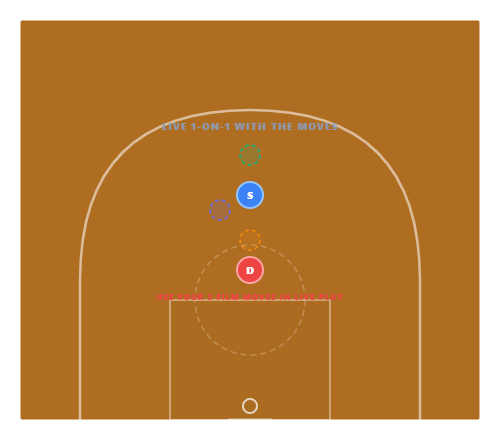
Step 3 — Live 1-on-1: Play live 1-on-1 with one rule: you can ONLY score using the 3 moves you studied from film. No free-lancing, no layups, no plays you already know. Force yourself to use the new moves against a real defender. 10 possessions. Track how many times you successfully execute each move AND make the shot. This is where film study becomes real skill.
Coaching Points
1 Film study is not optional — the best players in the world study film daily. You should too.
2 When watching film: pause on the FOOTWORK. Ignore the result. The feet tell the whole story.
3 Walk-through reps are the most valuable: your body learns complex movements at slow speed first
4 In live 1-on-1: don’t abandon the new moves when they fail. Commit to them. Failure is how you learn.
5 Do this drill once a week with a different player each week — build a library of stolen moves
6 Track which moves work in live play and which don’t. The ones that work become YOUR moves.
How Pros Train
Every elite scorer has a “move library” stolen from other players. Kobe Bryant studied Michael Jordan’s film. Kevin Durant studied Dirk Nowitzki’s film. The Film-to-Floor drill is how you build your own move library — systematically, not randomly.
Weekly Commitment
Dedicate one practice session per week to Film-to-Floor. Over a season, that’s 30+ new moves attempted, with the best 5-10 becoming permanent parts of your game. No other drill builds offensive creativity like this one.
By the Numbers
How mid-range and step-back shots perform at the college level — and why mastering them gives you an edge that analytics can’t take away.
Pull-Up Mid-Range
42-48%
Short Step-Back
40-44%
Long Step-Back 3
30-35%
Catch & Shoot 3
38-42%
Floater (6-12 ft)
44-48%
Rim Finish
58-65%
Free Throw
72-78%
Mid-Range Renaissance
The mid-range was declared "dead" by analytics. Then DeMar DeRozan, Kevin Durant, and Kawhi Leonard won playoff series living in the mid-range. The shot isn't dead — bad mid-range shots are dead. Created, off-the-dribble mid-range jumpers are among the most valuable shots in basketball because they're available anytime, against any defense.
Step-Back Economics
The long step-back three converts at ~30-35% — below the league average for catch-and-shoot threes. But its value isn't efficiency; it's AVAILABILITY. You can create it against any defense, any time, with no teammates needed. That's worth more than a perfectly schemed open three you might get once every 5 possessions.
The Clutch Factor
In the final 2 minutes of close college games, the mid-range pull-up and step-back account for over 40% of made field goals. When the defense tightens, plays break down, and the shot clock is dying — these are the shots that decide games. Shooters who can't create off the dribble disappear in crunch time.
Practice → Game Drop-Off
Expect a 10-15% drop from practice to game percentages. If you shoot 45% on mid-range pull-ups in practice, expect 32-38% in games. This is normal — game speed, defense, fatigue, and pressure all reduce efficiency. The goal is to close the gap through volume, game-speed reps, and mental preparation.